The way to enlightenment within Affinity is paved with many paths. If you use the Designer app, you’ll know exactly what I mean.
All of the motifs above were cobbled from other vectors from Craftsmanspace with A LOT of work to clean them up and get them right.Composition should be dominated by the label … I know. Pure indulgence on my part. I’ll post the recipe later.
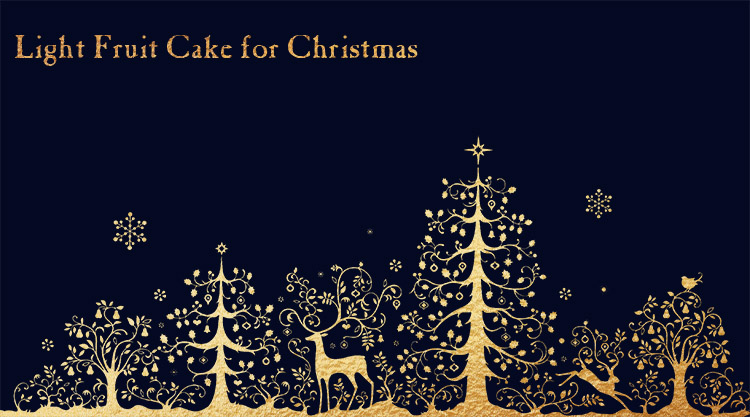
It’s September and I’m already thinking about Christmas. I have two fruit cakes made: the fruity-fruity light (er) one I posted a couple of weeks ago and a richer, more traditional one. Now thinking about Lebkuchen…
It’s lighter but don’t mistake this cake for one that goes easy on the calories…
This cake is lighter than traditional Christmas cake but there are enough common ingredients to strike up a friendship between the two.
It keeps for months if well-wrapped and stored in a cool place. This means it’s ideal for making around August or September to be properly mature in time for Christmas. Add some pokey alcohol and it’s a proper grown up’s cake by anybody’s standards.
Note
Allow a day or two before you plan to bake it as it’s made
in two stages:
1. Chopping and soaking the fruit for a day or so.
2. Mixing all the ingredients together and baking.
Tin preparation
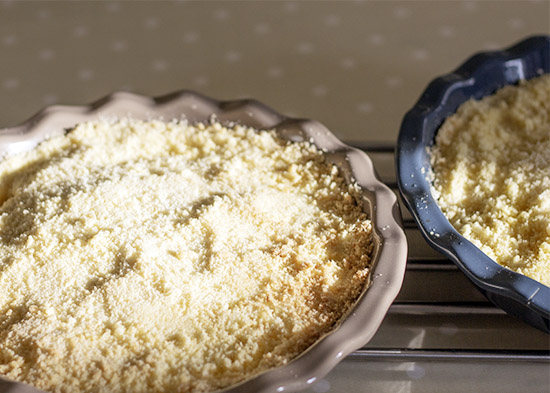
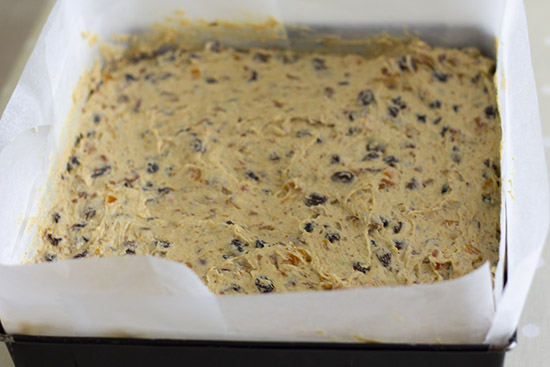
The recipe makes a 10” square cake (3” depth). Double-line a 10” square tin with greased parchment or greaseproof paper and give the cake tin a ‘collar’ of an inch or so (ie, cut the paper so that it is taller than the tin by about an inch).
Ingredients
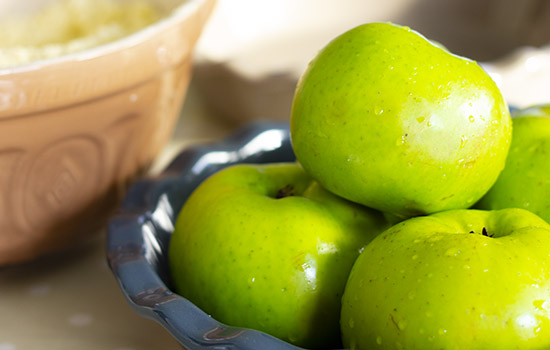
Chop the fruits below fairly small. These will be steeped in alcohol, or fruit juice, if you prefer a non-alcoholic cake
150g Figs
150g Dates
100g Crystallised Ginger
200g Glace Cherries
100g Crystallised Pineapple
100g Candied Peel
300g Chopped Apricots
350g Currants
200g Raisins
200g Sultanas
Juice and zest of an orange
Juice and zest of a lemon
10 TBS Malibu (or spirit to your liking)
Ingredients to be added to the soused fruits:
450g Butter
375g Demerara sugar
6 eggs
450g Plain Flour
125g Ground Almonds
225g Chopped Pecans
1.25 tsp Baking Powder
Method
In a large bowl stir together the chopped fruits
with the orange / lemon zest, juice and the 10 tbs or so of your chosen alcohol
or fruit juice.
Cover the bowl with cling film and leave to soak
24 – 36 hours.
On the day you bake:
Cream the butter and sugar together until fluffy.
Sieve the flour, baking powder and ground almonds together.
Crack the eggs into a bowl and give them a quick whisk.
Add the eggs and butter mixtures to the flour alternately, a little at a time.
Stir the chopped pecans and soaked fruit to the cake batter.
In the tin
Baking
Baking time is approximately 3 hours at two different temperatures – see below.
Pre-heat oven to 160°
Transfer the mixture to the cake tin.
Cover the cake with a square of parchment.
Place on
the middle shelf of the oven.
Bake for 1.25 hours at 160°.
Turn the cake round, reduce the temperature to 150° and bake for a further 1.5 – 2.0 hours.
Check the cake with a skewer during the last stage of baking. When the skewer comes out clean, take the cake out of the oven and leave to cool in the tin.
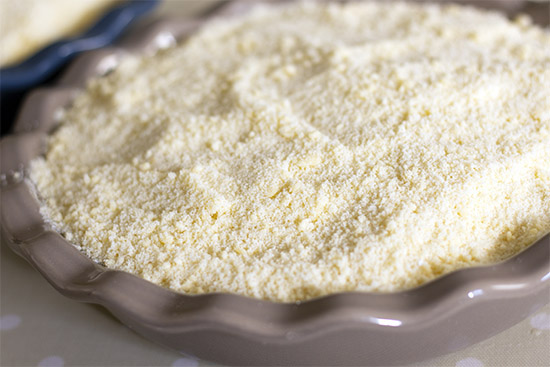
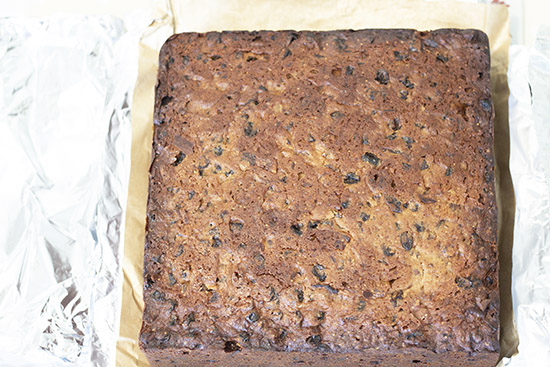
Baked, cooled in the tin and getting wrapped up for the winter
Remove the cake from the tin, wrap in parchment and a final wrap of tin foil. Mine is a little overdone around the edges (I forgot to check it in its last hour… pah) but these will be sliced off before icing.
This cake will keep for months and will taste even better for leaving it to mature, especially if you give it a regular feed (a TBS or so) of Malibu, or other spirit / juice, until you’re either ready to eat it or wish to cover it with marzipan and fondant / royal icing, etc.
Or just be daring and eat it naked. Told you it was a proper grown up’s cake…
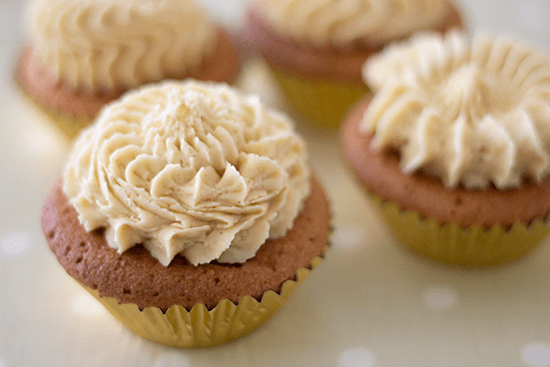
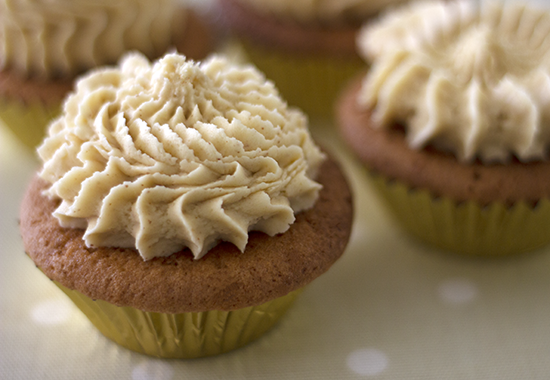
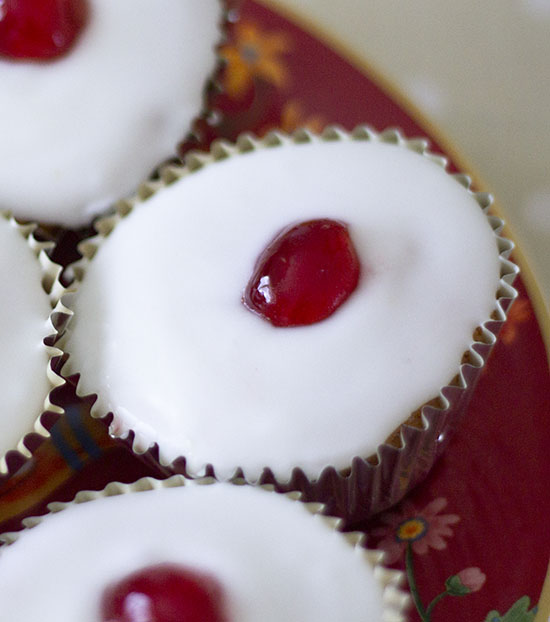
Made a batch of Jemma Cupcake’s PB & J cupcakes and they turned out lovely.
No raspberry goo drizzled over the top but there is a secret, sweet jammy centre. Apple corers are perfect for taking out neat holes from the cupcakes for filling with a nice blob of sweet raspberry goo.
The icing nozzle is a large open star, twisted one way then the other as I piped giving them a sort of fossil top.
When you get interested in making flowers and decorative sugar doodahs for cakes you soon realise the shortcomings of plain fondant. You can add some oomph to it by mixing in some Tylose powder but for real, magical modelling properties, you need gumpaste. *Sigh*
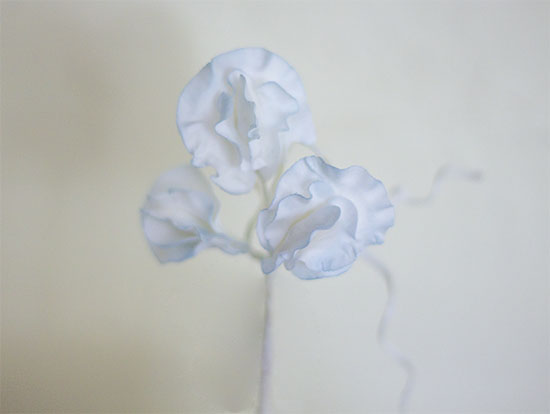
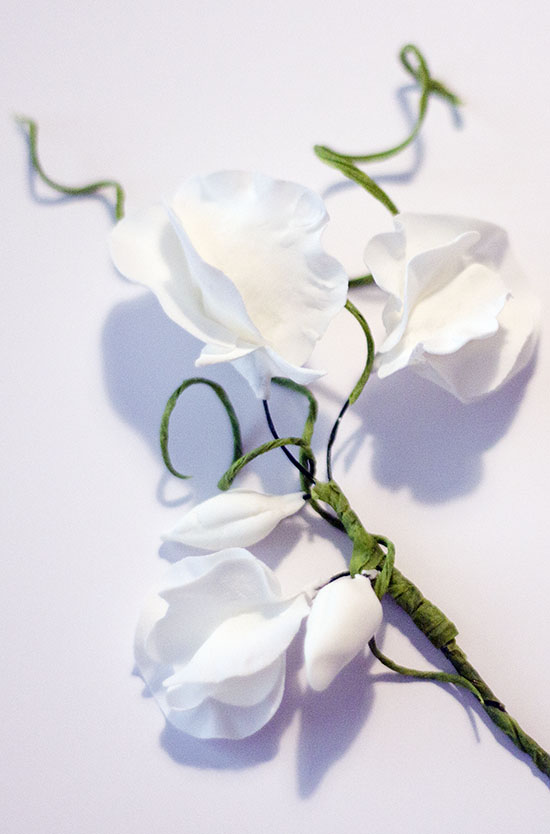
Sweetpeas are made of this, who am I to disagree?
Gumpaste lends magic to your crafting skills and transforms difficult fondant to fine porcelain masterpieces… with some practice and a bit of help!
What help? As ever, YouTube has a tutorial for everything! I’ve compiled a list of my favourites.
If you’re making flowers for a cake, some of these tutorials are bound to inspire so give them a go.
Fondant is … well, fondant. But, you want to make flowers it just fails. It develops what is called ‘elephant skin’ and goes all crepey and crinkled and doesn’t have the elasticity to be frilled or fluted.
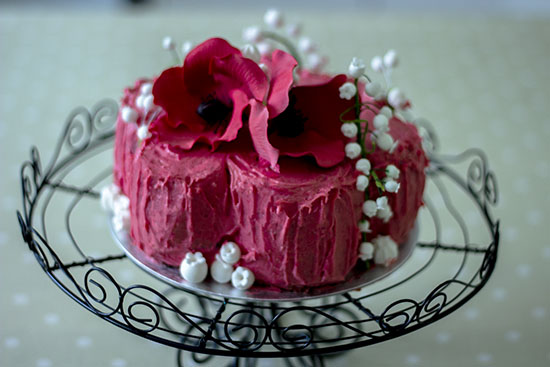
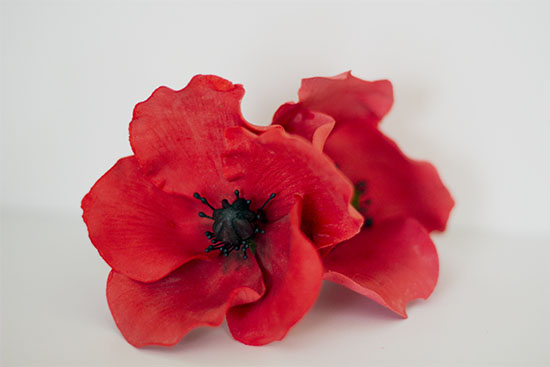
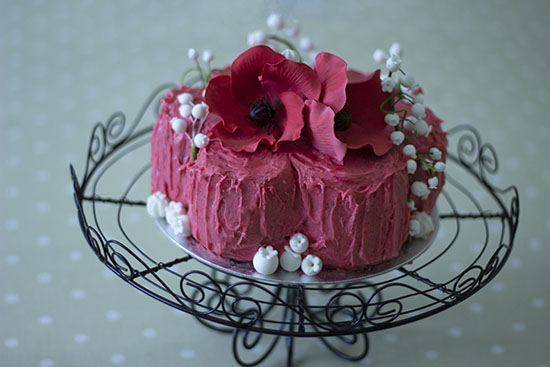
What to use? Gum paste. Take a look at the gumpaste poppies I made last week. I couldn’t have made them with plain fondant.
Gumpaste poppies inspired by Renee ConnorLemon & Poppyseed cake with gumpaste poppies and lily of the valley
I used the poppies to decorate a lemon and poppyseed sponge just perfect for Sunday teatime. It is filled with raspberry buttercream and covered with raspberry ganache.
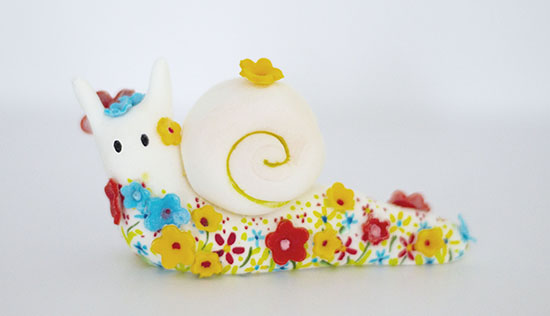
Found the cutest clay snail models made by Joo Joo on the net and had a go at doing something similar with gumpaste.
You can see how simple the basic shape is. I cut a ‘V’ into the head and tapered the V into antennae. The flower details were painted on using a fine 00 brush and Sugar Flair edible colouring. The fondant flowers were made with a petal cutter (plunger type).
Inspired by CreationsCeeCee YouTube tutorial about being stuck creatively
I started painting for the first time in ages this morning. I’d stumbled upon CreationsCeeCee on YouTube and was inspired to get my paints out and dabble (as above).
Cats and the vet
Jess has had some problems recently and was having a follow-up exam. Turns out she has diabetes and is now on insulin. Apparently, cats can go into diabetic remission so fingers crossed that this won’t be a long-term, chronic condition.
The second visit was with a stray cat who seems to have adopted us. His visits have become daily over the last 6 months (he has been coming around for over 18 months). The poor thing is always beaten up. Scratches, bites… and he’s dirty and hollow-legs-hungry. Yesterday, he was limping and dripping small drops of blood as he walked. We decided to take him to the vets and get him seen to.
We also decided if he wasn’t chipped, we’d have him spayed and take him in.
Checkpoint Charlie
He wasn’t chipped so we let the vet do a full check on him. He was screened for FIV, treated for worms and fleas, had a bite to his leg stitched up and his other scratches and wounds cleaned and treated. A shot of long-lasting antibiotics and he was done. We’ve called him Charlie.
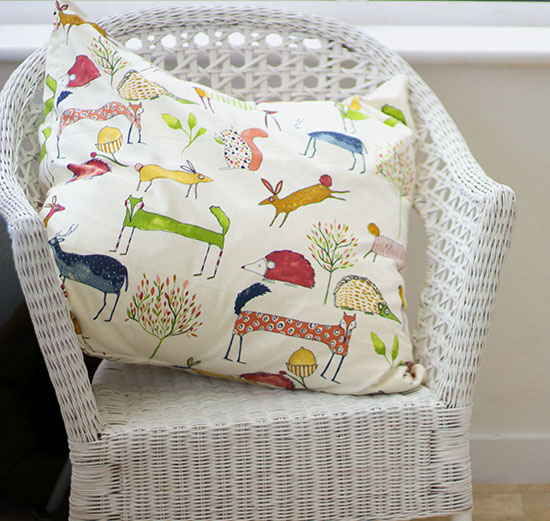
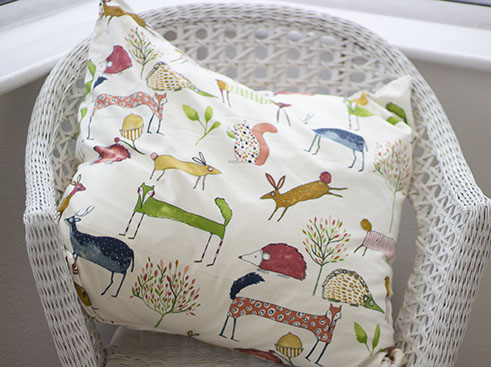
Cushion
In between vet visits, I kept myself occupied with a couple of projects. The first was to run up a cushion and use the last of this lovely watercolour animal fabric. Charlie likes to stretch out on the cushion and have a good nap.
Gumpaste is perfect for making flowers and leaves. It has the strength and elasticity to lets you ruffle, smooth and stretch it to make petals and flowers with a realistic look.
I am totally in awe of the talents of Nicholas Lodge; check out one of his YouTube tutorials and you’ll see what I mean. Another one I love to watch is Renee Connor.
I’m still at beginner level but still proud of the results. Not too shabby.
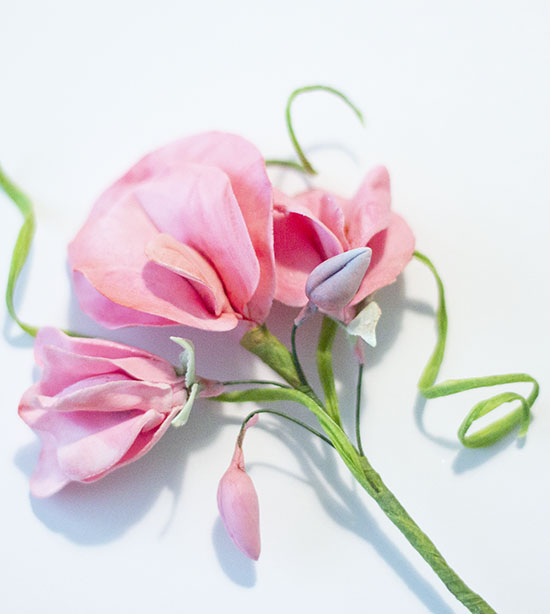
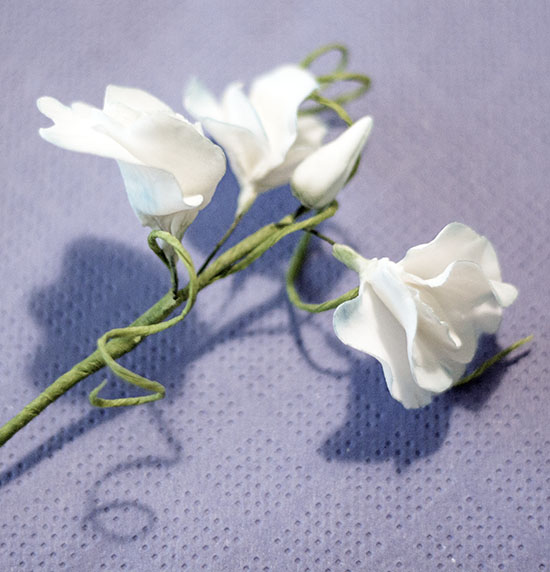
Sweet Peas made following a Renee Connor YouTube tutorialSweet Peas come in all sorts of shades. These were left white with a light brushing of petal dust on the edges and a soft dusting of foliage green at the base of each flower.Plain white ones
The floristry tape got a bit manky here! Still, am getting there and learning more as I go along.
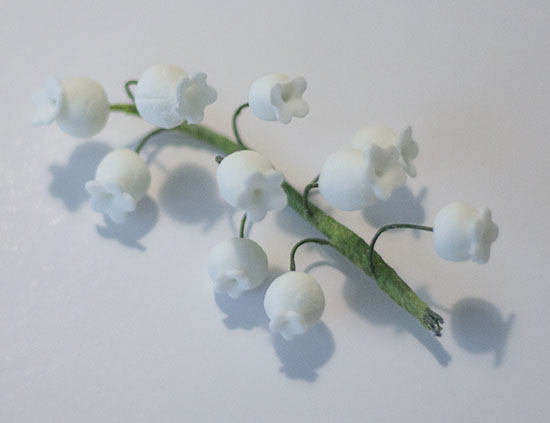
Lily of the Valley
These little flowers are little more than a ball of gumpaste with a small flower shape (don’t know what they’re called but they’re on Amazon. Simply roll a small ball of gumpaste, dip a floristry wire into egg white (you can get powdered, pasteurised eggwhite on Amazon) or edible glue.
Roll out the gumpaste, cut a flower with the plunger tool, dab a tiny spot of edible glue or egg white onto the ball and press the flower out.
My next projects are peonies – there are huge numbers of YT tutorials to choose from. And Renee Connor’s Poppies. I adore her poppies.
I have the stamens already and found that a set of hemostats I bought for making Tilda dolls come in very handy for placing tiny elements onto cakes and for forming the ridges of a poppy seed head.
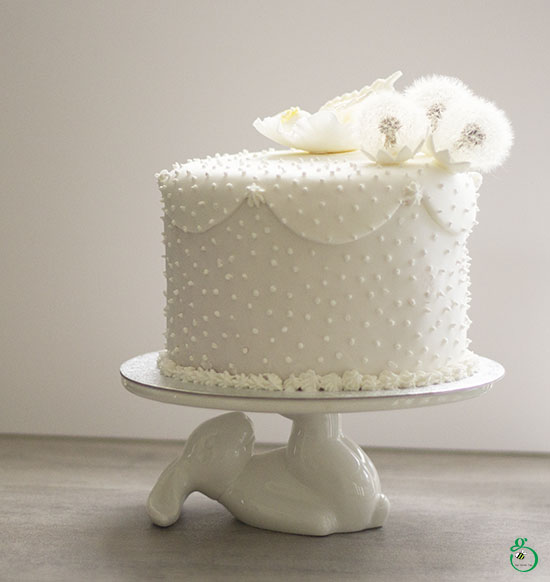
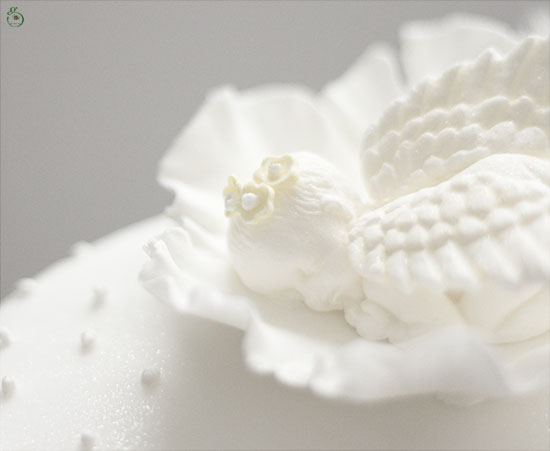
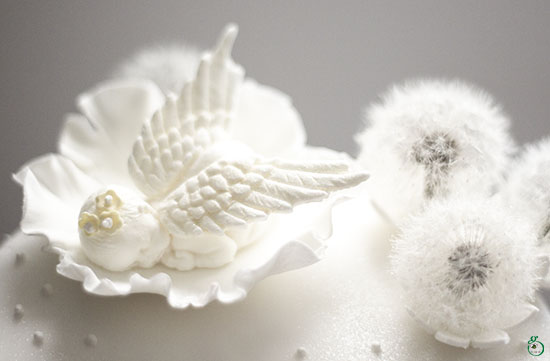
Sugar paste baby with edible silk-lustred dandelion seed heads
This week’s cake is a chocolate sponge layered with blackberry and raspberry compote buttercream with fresh chopped berries mixed in for added lushness.
It was crumb-coated, covered in fondant then dotted with royal icing to give it surface texture and interest.
The topping – sugared dandelion seed head (picked from my back garden, well away from car exhausts, no insecticides or weed killer).
The flower was molded using sugar paste and the baby was formed in a silicone mold that I got from Amazon.
I really enjoyed the icing. I haven’t done it for a while and need some practice!
Baby is perfect for a christening cake topper.
Royal Icing
400g Icing sugar
15g dried egg white
Approx. 5 TBSP water
Beat the ingredients together with an electric mixer for about 5 minutes. The consistency depends on what you want to do with the icing. Mine formed firm peaks with some yield in them.
If you make too much, you can freeze it for a month; just give it a good beat when it returns to room temperature.
The baby mold arrived with a separate wings mold.
Lustre dust drizzling across the top of the cake gives it a twinkly, delicate sheen.