Selecting brushes to apply patterns in Photoshop

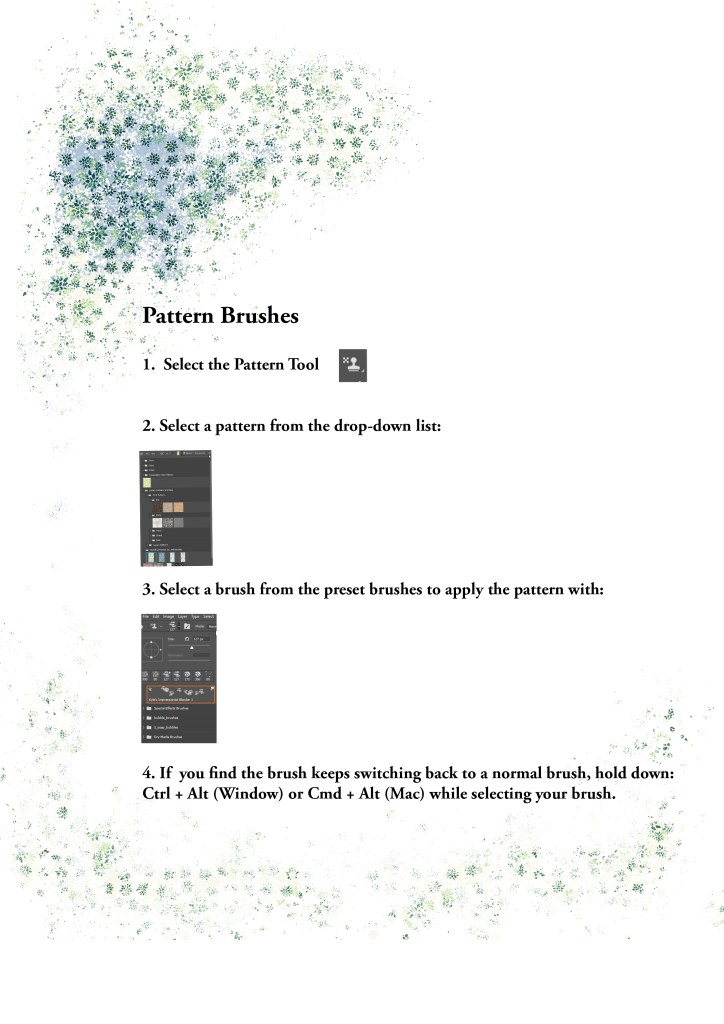
The Pattern Stamp Tool is something I like to make use of from time to time. You can create your own pattern stamps by drawing a square marquee around a pattern sample then going to Edit>Define Pattern. PSD prompts you to name it – simple.

The fun is selecting different types of brushes to apply it with – but you might find some brushes just can’t be selected – or can they? Yes, hold down Ctrl + Alt (Windows) or Cmd + Opt (Mac) while selecting a brush.

Thank you to Mel's brushes for her free grandmas flower set: http://www.melsbrushes.co.uk

Create a Bokeh Background with Illustrator and Photoshop

Today’s tutorial walks you through the process of creating a gradient mesh in illustrator to make a coloured backdrop. It then takes you through the steps to make a bokeh brush in Photoshop and how to apply bokeh over your backdrop. Create a beautiful background image suitable for loads of different applications.

The free pdf tutorial is here:

Use a Photoshop mask to put text behind an image

Jessie

This is Jess. She developed diabetes early last year and it’s taken a lot of experimentation, a couple of changes of insulin and various dietary changes to get it under good control.

She’s now a new woman. Still feisty with an attitude you can hang your coat on and still loves a fishy supper. Charlie calls her ‘the one with the breath’ but not so as she can hear him…

She’s my sweet girl and though she’s calmer than the fearful rescue cat from a few years ago, and she’s more Paws than Claws, I’m still careful around her. We love her to bits and after being with us 6 years now, this is her forever home.

Down to business. Look at the image and you’ll see the text goes between her and the background. It’s actioned with a simple masking technique in Photoshop. If you want to know how to do it, download the pdf for the instructions:

Make a paper jubbly with printed graphics

Paper jubblies are great to make. You can personalise one by printing your own graphics.

If you want the graphics to be the right way up whichever way the jubbly is facing, follow my tutorial.

It will walk you through the steps to setting up the area to fill with graphics, how to hot foil and then how to make the final jubbly. Great way to make a small gift look very special 🙂