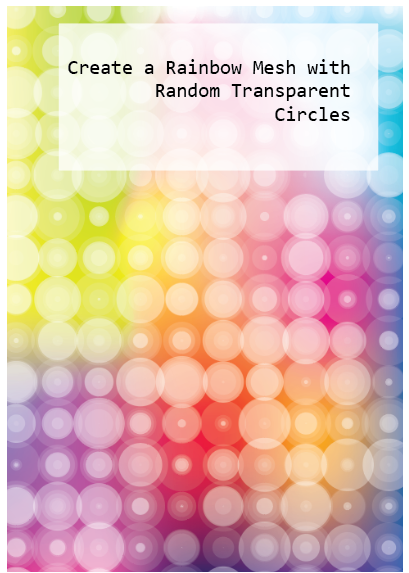
How about a Rainbow Mesh overlaid with circles of varying transparency? It has vibrancy, lots of colour as juicy as you like, and offers a refreshing antidote to the grey feel of last year. You can work this up to fit in with loads of design applications. Colour yourself happy 🙂
It looks like it’s a lot of work but it’s really easy to create and edit. I’ve written up a pdf tutorial for you here:
It can feel a bit like wrestling with a pig. I felt this way about getting back into animation. All those layers. Controlling timings, anchorpoints, sequencing and a big old wallop of mad effects and presets to choose from. Which bit goes where …. and when? Made that flat pack look pretty enticing.
Butching up, I thought : “Wir schaffen das!” especially as my work machine got upgraded to a super spanky Surface Book 3 with pen a week ago and my personal machine got a sh*t-off-a-shovel new graphics card for Christmas. No excuses.
I took a deep-dive into Animate and After Effects and got on with it. Every day’s a school day with You Tube and I kind of binge watched tutorials for both apps and applied the principles as I went. Both apps are fairly intuitive once you familiarise yourself with the layouts and menus. Not massively time consuming and isn’t it great to invest in yourself and develop new skills? Give this year a new set of boots and career path 🙂
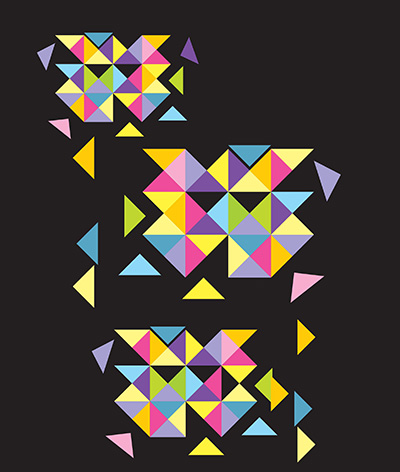
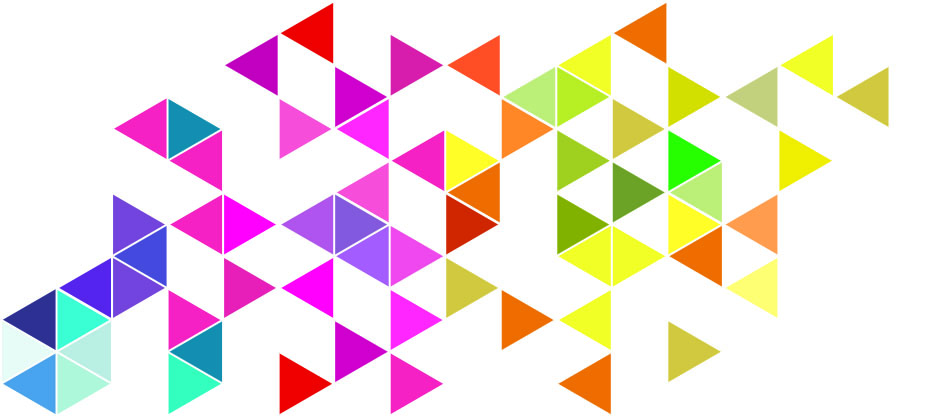
You need to whip up a colourful design that can suggest dynamics and direction. Geometrics is one way to go. Triangles. Dynamic planes of colour. But how? How much time do you have to create a triangle? give it a fill? go through aligning and offsetting…? So much to do, so little time…
Well, there’s an easy and quick way to whip up a whole kaleidoscope of tesselated right-angled triangles. (Angles make a big difference. My previous tutorial on tesselated trinagles was for equilateral ones, ie, 60° insides which don’t make up a square). You could use a hexagon to create them …. you’ll understand when you read the tutorial 🙂
But back to right-angles. These have 90° angles and will form a square and that’s the secret to their creation. Live Paint does the rest. Download my free pdf tutorial and get going.
One more thing
Want the Alt-code to insert a degree symbol? Save searching through glyphs?
Do you find yourself getting stuck in the middle of a design wondering how to achieve the image in your head? Then panicking about how long it’s taking you to figure it out? Then throwing the towel in and opting for something lamer but safer? Promising yourself you’ll make the time to find out for some future time? But that time never comes…..?
How about a quick cheat sheet? Lots of basic principles that strip out the mystery real quick so you can grab the technique and get going…
That’s what I’m posting today. A collection of quick tips on making shapes with Illustrator. Not really for beginners but not advanced by any means. Most are super easy and you’ll breeze through them 🙂
My cheat sheet includes uses for the Shapebuilder Tool, Live Paint, Pathfinder functions, Effects and lots of super stuff to get you running in no time.
See the graphic below? Pathfinder’s Divide function made it a cinch to create!
FREE Download the cheat sheet below and get going:
The Japanese philosophy of Ikigai is the pursuit of happiness through being busy in a way that brings meaning and joy to your life.
If you know there is a passion inside you and a talent that gives your life meaning but don’t yet know what your Ikigai is, then your mission is to find it.
When you find joy in something meaningful to you and you’re good at it, you have found your Ikigai.
If you Google Ikigai you will frequently find the defining principles for determining your Ikigai depicted by a Venn diagram. Intersections denote shared or common attributes, the central one being the sweet spot, your Ikigai.
Here’s how to create an Ikigai (or any!) Venn diagram and be able to colour individual segments quickly and easily. Download the pdf here:
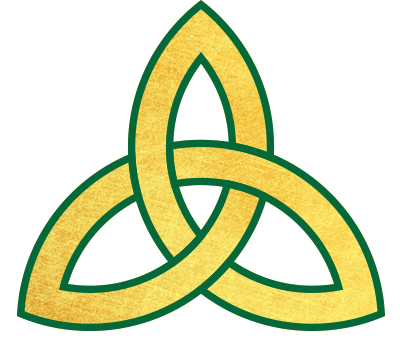
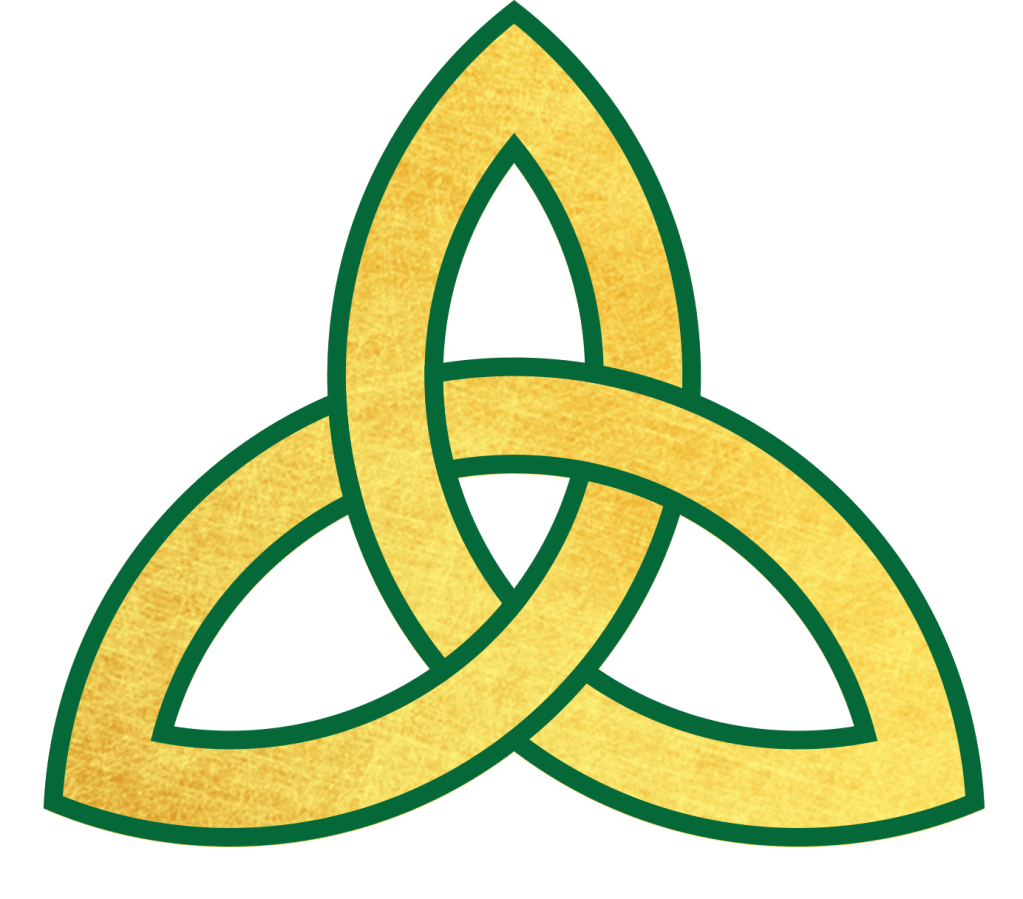
Today I’m going to show you how to create a ‘triquetra’, also known as a “trinity knot”, a popular design element in Irish jewelry such as Claddaghs and wedding or engagement rings. Like all Celtic Knots, it’s comprised of interwined loops and lines that may look difficult to reproduce. Illustrator has the tools to make it an easy task.
Today’s tutorial shows you how to create a spread of equilateral (60° angles) tesselated triangles and fill them with colour using the Live Paint Tool.
Inspiration for graphic design is everywhere but sometimes our enthusiam gets damped down with decision fatigue or deadline pressure. We all want to produce something creative, something to give the eyes a real feast. And show off our skills.
Today’s tutorial will give you all that and more. It shows you how to use the Blend Tool and make friends with the Envelope Distort Mesh monster 🙂 It also shows how easy it is to create glowing particles and save them as Symbols. All in less than 30 minutes. Promise.
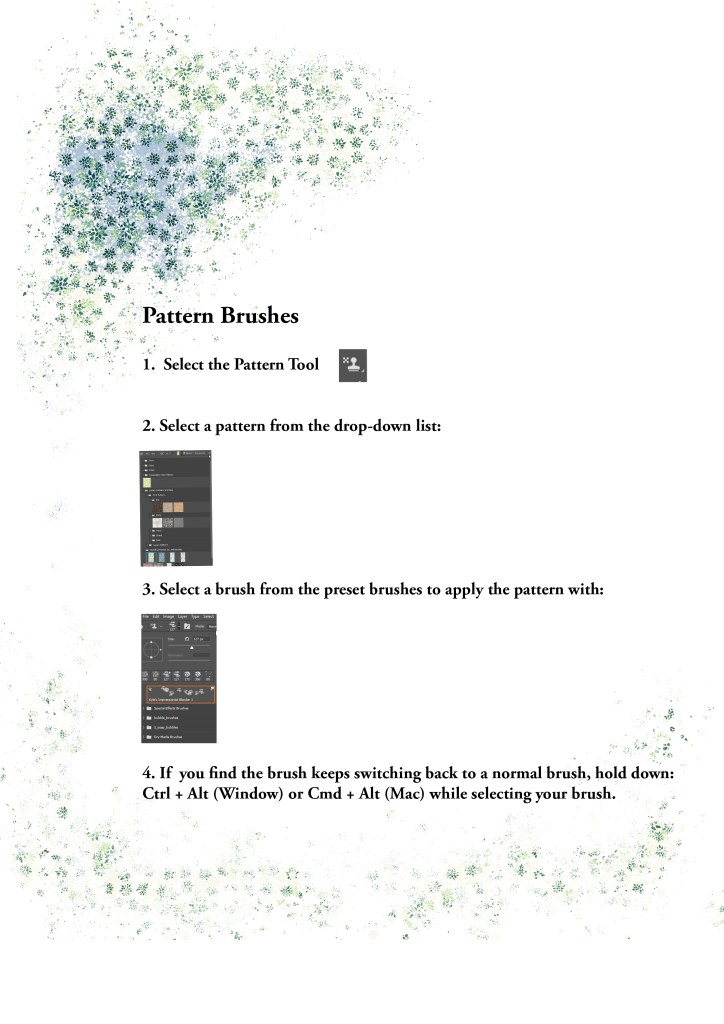
The Pattern Stamp Tool is something I like to make use of from time to time. You can create your own pattern stamps by drawing a square marquee around a pattern sample then going to Edit>Define Pattern. PSD prompts you to name it – simple.
The fun is selecting different types of brushes to apply it with – but you might find some brushes just can’t be selected – or can they? Yes, hold down Ctrl + Alt (Windows) or Cmd + Opt (Mac) while selecting a brush.
Thank you to Mel's brushes for her free grandmas flower set: http://www.melsbrushes.co.uk
Today’s tutorial walks you through the process of creating a gradient mesh in illustrator to make a coloured backdrop. It then takes you through the steps to make a bokeh brush in Photoshop and how to apply bokeh over your backdrop. Create a beautiful background image suitable for loads of different applications.


