An oeuf is enoeuf

Easter’s been and gone now. Only had the one egg but, as they say, an oeuf is enoeuf… .

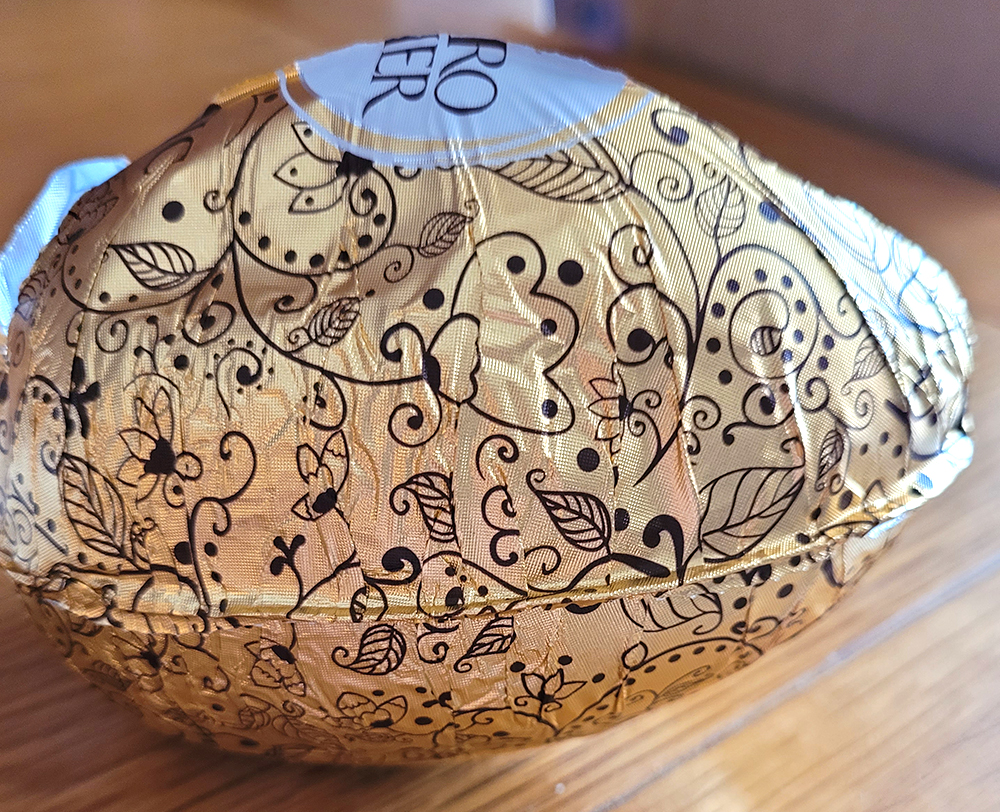
A Ferraro Rocher. Seven euros, I think.. or was it eight? But… Urfff it wasn’t nice. Between us, we ate half and chucked the rest away. And it was an empty shell. No sweeties inside. Bleh. So, with a face like a dropped pie, tried to appreciate the pretty foil packaging. It IS pretty.

Husband got his absolute favourite. A kilo bag of mini eggs. Sounds like gluttony and death by chocolate but they’ll actually last us him weeks.

Anyway, had a passion to fulfil. A project that jumped into my head a couple of weeks ago.

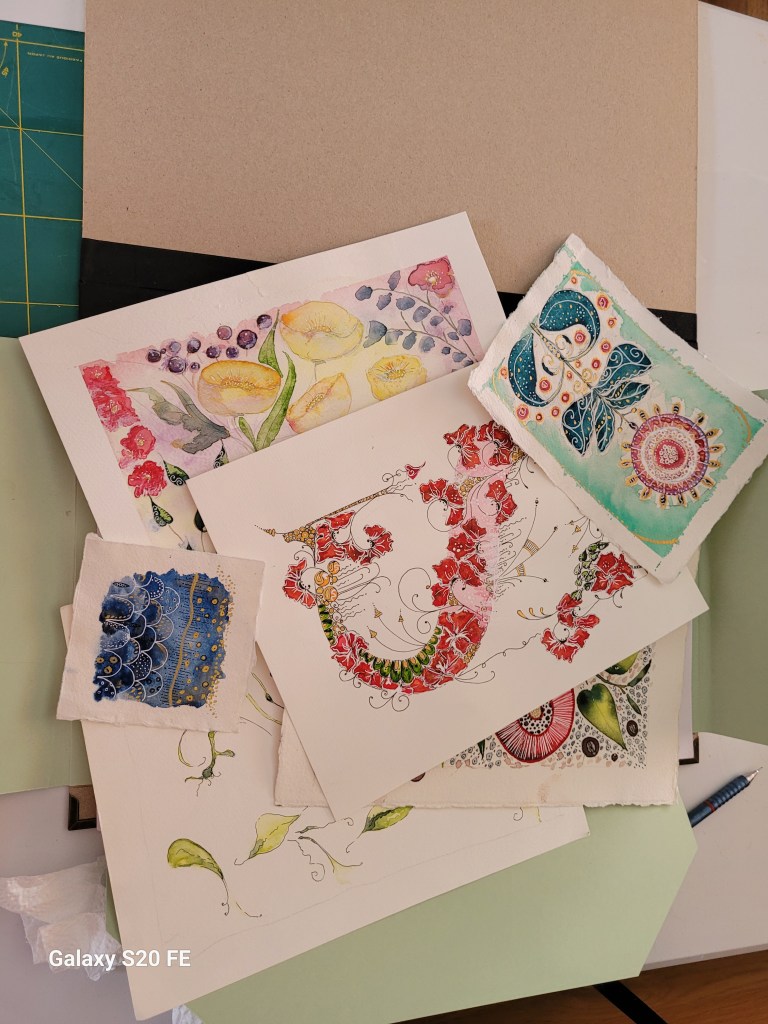
Since starting art classes, have been looking for a nice folder to carry artwork in. Keep paintings separate from other art supplies in bag. Nothing on Amazon or proper shops (do leave the house occasionally) had anything to inspire me. Those black polyvinyl carry cases look nasty.  

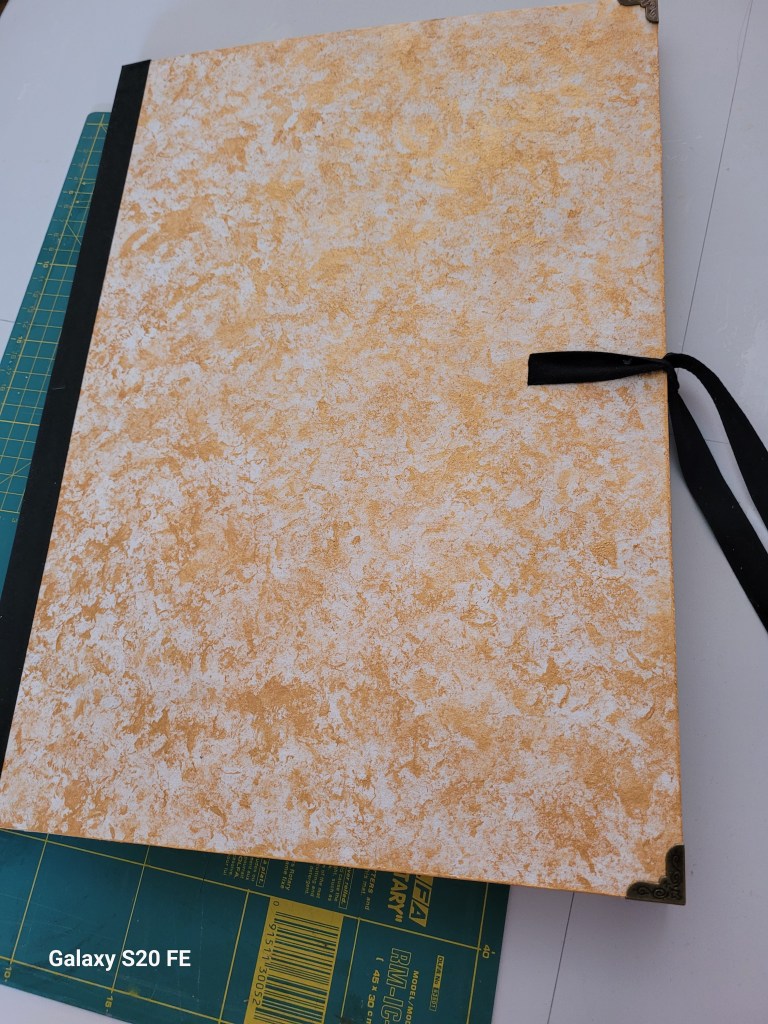
Lessons learned and all that. Took measurements and documented the process. All good. Still very functional but lacking finesse.

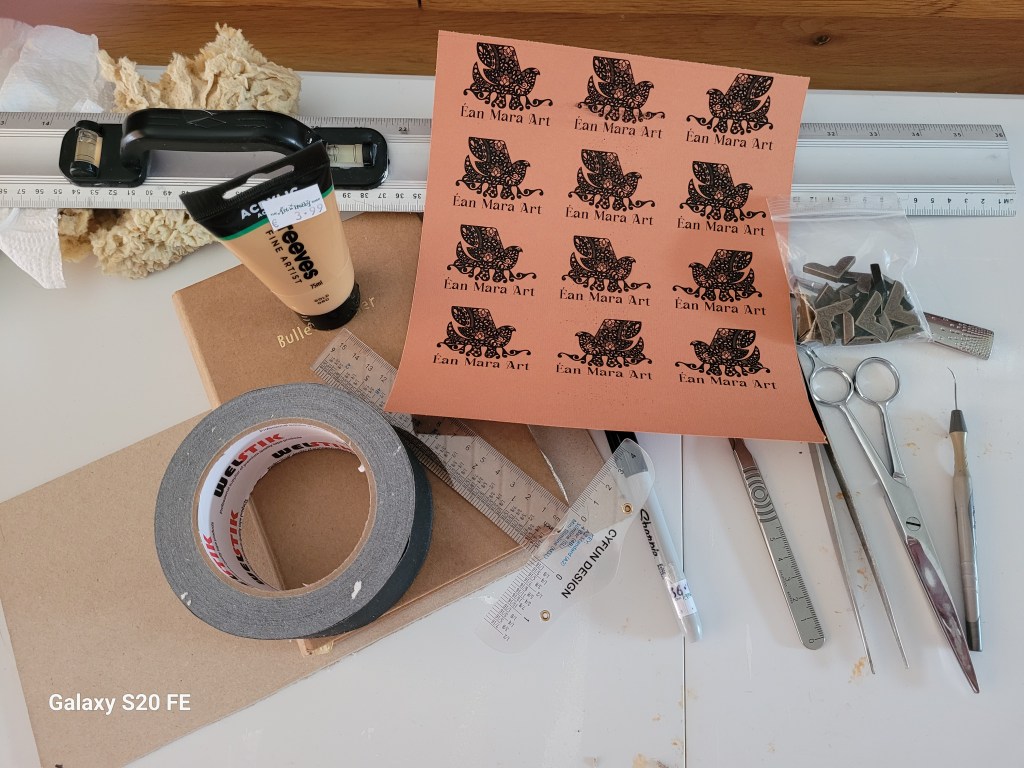
Second go. Got out the operating table for the tools and equipment.

It has fold over flaps in the back, decorative metal corner protectors and cotton-twill ties (for when it goes to dinner or attends interviews, etc, ha ha).

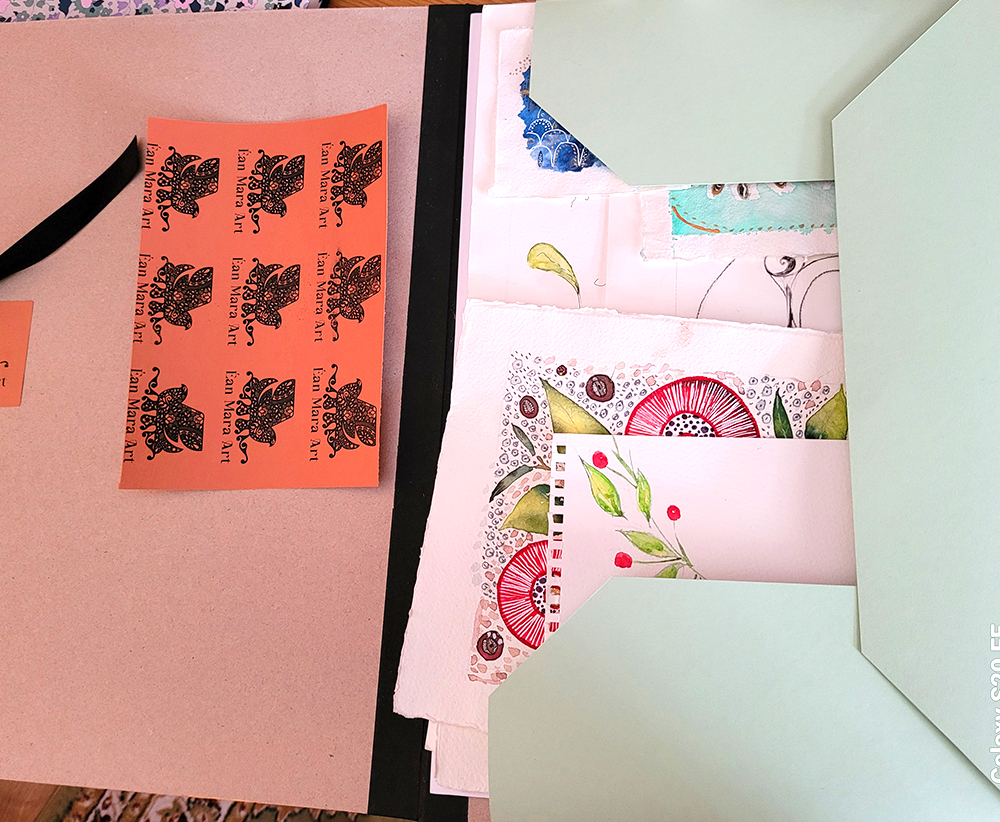
 Designed the labels in Illustrator. It accommodates A3 so large enough for my art work.

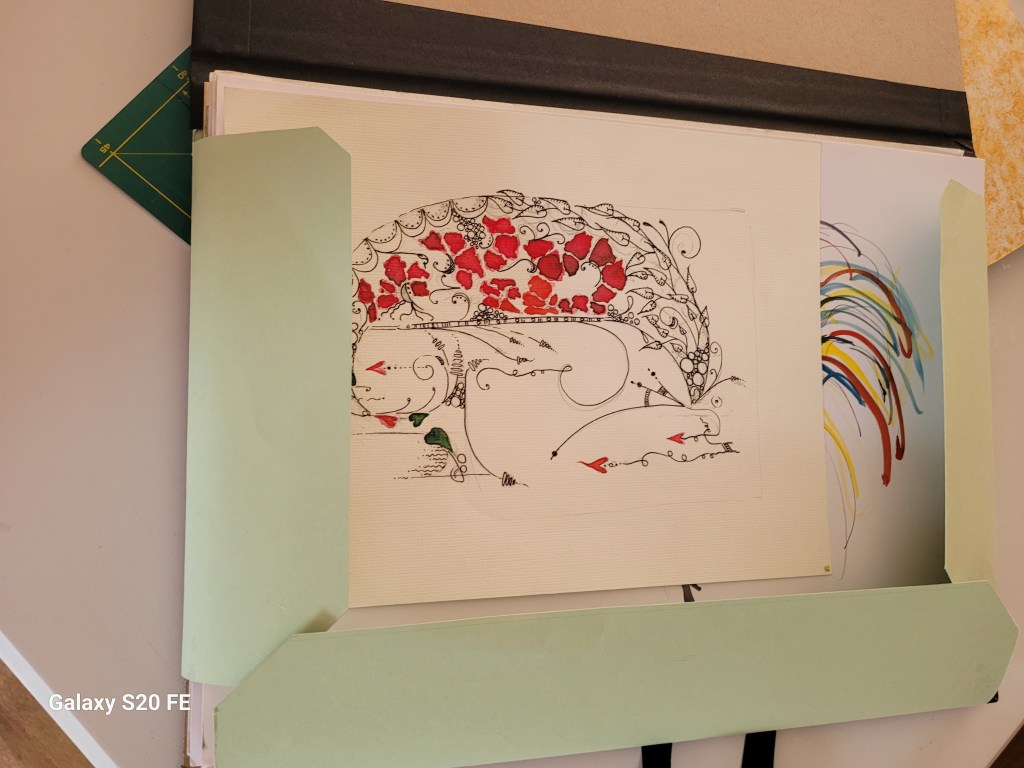
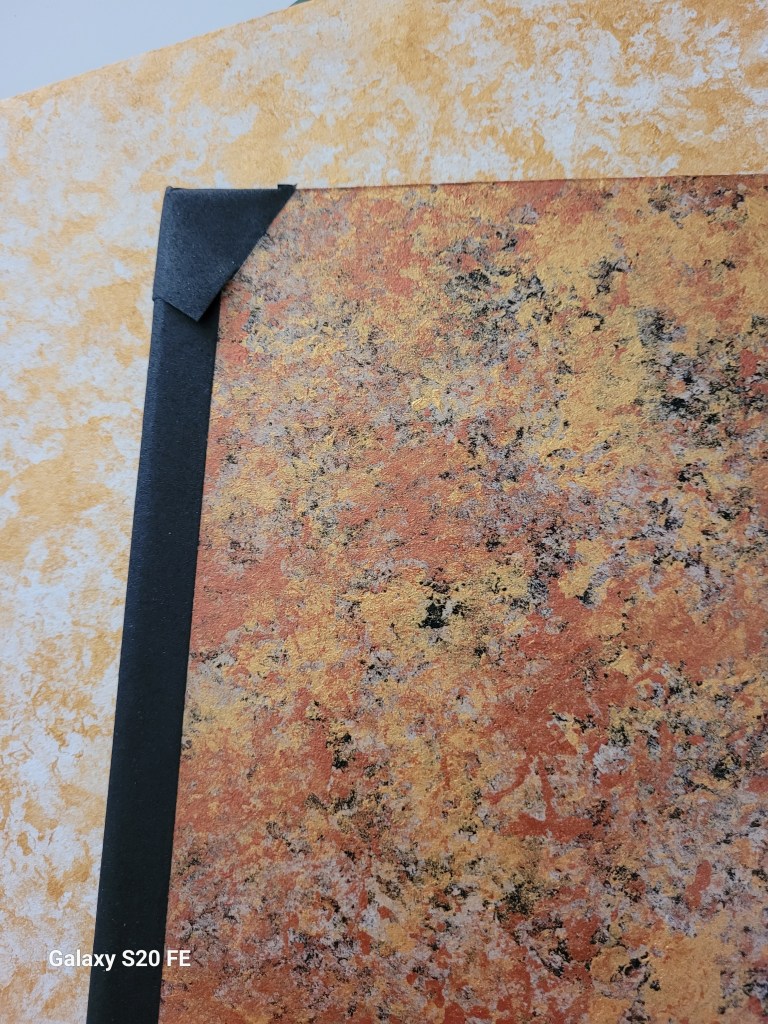
I made the flaps wider than those in the original (above) so they overlapped better.

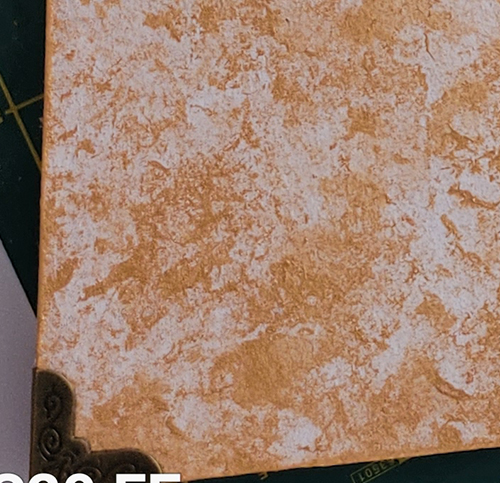
The metal corners are bigger than the original as well. Secured with a spot of glue and a crimp.

Still a few tweaks to make but not in a hurry to make another just yet because I love it.

Talking of leaving the house, the sun is bloody shining today so can wear new DMs – Clarissa leopardskin sandals – and show off newly-painted Plum Pudding purple toenails. High gloss. Brill.

Create an elastic background shape for text with Adobe Illustrator

Hi There!

Today I’m sharing a fast tip to show you how to create a background shape for text. The power of this tip is that the shape will extend or shrink to the length of the text automatically. Edit the text and the shape will stretch or shrink to fit. A one-size-fits-all and it’s fabulous because it’s so easy.

The steps are in the pdf here:

🙂

Gimme an ‘A’

Remember the tutorial from a previous post back in Dec 2020?:

Do you wonder if there’s a quicker way to do something in Illustrator? There’s a tutorial on there to create the As in illustrator.

I used them to create a very quick and simple animation in After Effects


Import the file you would like to apply the explosion effect to. You don’t need layers.

Select Pixel Poly from the Effects & Presets – tweak the settings how you like.

I made it a sub-comp because I wanted to use Time Remapping and it doesn’t seem to work unless it’s applied to a sub-comp.

Select Time Remapping. This will insert a keyframe at the beginning and end of the composition (mine was 5s long, if I remember correctly) then swap the two keyframes over so that the end position becomes the start and the start becomes the end.

Then it’s up to you to play with the speed, Easy Easing, Graph Editing etc.

Finally, I imported a sound effect called ‘slurp’ from Envato Elements.

Render to format of your choice and done.

Touching Triangles in a Circle – Illustrator Tutorial

The Transform Effect options in Adobe Illustrator are very powerful but can be hard to master. Take touching triangles in a circle.

I know of two ways to create them. Using Trig or a dead simple way. Download my free pdf tutorial to learn both ways.

Create a jazzy background in a jiffy with Adobe Illustrator

How about a Rainbow Mesh overlaid with circles of varying transparency? It has vibrancy, lots of colour as juicy as you like, and offers a refreshing antidote to the grey feel of last year. You can work this up to fit in with loads of design applications. Colour yourself happy 🙂

It looks like it’s a lot of work but it’s really easy to create and edit. I’ve written up a pdf tutorial for you here:

Tesselate Your Triangles with Live Paint in Illustrator

You need to whip up a colourful design that can suggest dynamics and direction. Geometrics is one way to go. Triangles. Dynamic planes of colour. But how? How much time do you have to create a triangle? give it a fill? go through aligning and offsetting…? So much to do, so little time…

Well, there’s an easy and quick way to whip up a whole kaleidoscope of tesselated right-angled triangles. (Angles make a big difference. My previous tutorial on tesselated trinagles was for equilateral ones, ie, 60° insides which don’t make up a square). You could use a hexagon to create them …. you’ll understand when you read the tutorial 🙂

But back to right-angles. These have 90° angles and will form a square and that’s the secret to their creation. Live Paint does the rest. Download my free pdf tutorial and get going.

One more thing

Want the Alt-code to insert a degree symbol? Save searching through glyphs?

Alt-0176 (numeric keypad)

Download my tutorial here:

Do you wonder if there’s a quicker way to do something in Illustrator?

Do you find yourself getting stuck in the middle of a design wondering how to achieve the image in your head? Then panicking about how long it’s taking you to figure it out? Then throwing the towel in and opting for something lamer but safer? Promising yourself you’ll make the time to find out for some future time? But that time never comes…..?

How about a quick cheat sheet? Lots of basic principles that strip out the mystery real quick so you can grab the technique and get going…

That’s what I’m posting today. A collection of quick tips on making shapes with Illustrator. Not really for beginners but not advanced by any means. Most are super easy and you’ll breeze through them 🙂

My cheat sheet includes uses for the Shapebuilder Tool, Live Paint, Pathfinder functions, Effects and lots of super stuff to get you running in no time.

See the graphic below? Pathfinder’s Divide function made it a cinch to create!

FREE
Download the cheat sheet below and get going:

Create an Ikigai Venn diagram in Illustrator

The Japanese philosophy of Ikigai is the pursuit of happiness through being busy in a way that brings meaning and joy to your life.

If you know there is a passion inside you and a talent that gives your life meaning but don’t yet know what your Ikigai is, then your mission is to find it.

When you find joy in something meaningful to you and you’re good at it, you have found your Ikigai.

If you Google Ikigai you will frequently find the defining principles for determining your Ikigai depicted by a Venn diagram. Intersections denote shared or common attributes, the central one being the sweet spot, your Ikigai.

Here’s how to create an Ikigai (or any!) Venn diagram and be able to colour individual segments quickly and easily. Download the pdf here:

Create a Celtic Knot with Adobe Illustrator

Today I’m going to show you how to create a ‘triquetra’, also known as a “trinity knot”, a popular design element in Irish jewelry such as Claddaghs and wedding or engagement rings. Like all Celtic Knots, it’s comprised of interwined loops and lines that may look difficult to reproduce. Illustrator has the tools to make it an easy task.

Get the pdf tutorial here: