How to create a line drawing effect in PSD

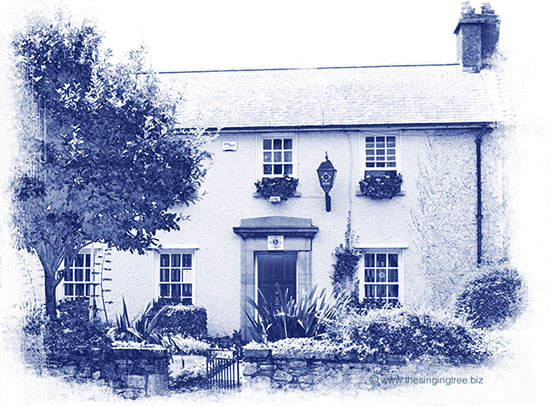
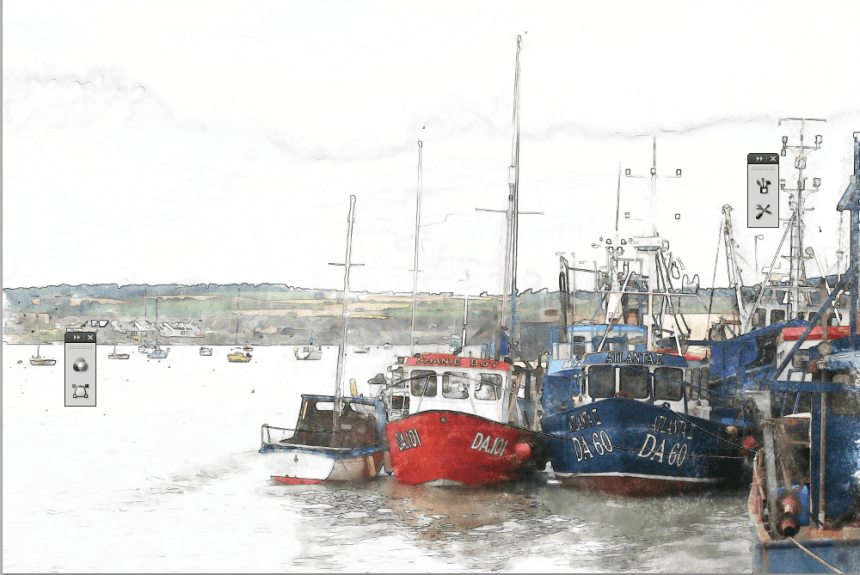
This effect is quick and very easy. It started life as a colour photo and within 5 minutes or so using Photoshop’s filters it became this bluey, almost inky, line drawing. You can spend longer to get every detail just-so  – I have another tutorial on here for creating a watercolour effect painting – use that as the basis for stripping out the details of your picture first if you have time to spend longer on your image.

Anyway, this was done in 5 minutes. I have my original notes written around one of my old doodlings pdf’d for you to download.

Gard station in Skerries

Create a shiny foil effect: PSD

Shiny Foil effect

Shiny Foil Effect:

  • Get your image into PS
  • Apply a colour overlay from the Layers Styles palette
  • Then go to Filter>Artistic>Sketch>Chrome

You might want to Bevel & Emboss (also in the Layer Styles palette) and you might want to play with the Chrome settings but these give you the basic steps.

Faux Postage Stamp Effect – basic steps

  • Select a round brush,  100% hardness
  • Select the same colour as you have as your background
  • In the Brushes controls, set the spacing so that it will make a ‘dotted line’ (you’ll be able to see the effect of increasing the distance in the preview panel)
  • Create a new layer
  • Align the brush so that it sits midway on the top edge of your image, hold down Shift to constrain it to a straight line and paint your row of balls along one of your straight edges, let’s say top horizontal.
  • Copy your dotted line layer, move the dots down to sit on the bottom edge of your image.
  • Select both dotty layers and use Align to line the layers up on the left or right edge.
  • Create a new layer, use the same brush and then draw a vertical row of dots down the left edge of the image.
  • Copy that layer and move the dots over to the right side of the image.
  • Select both of those vertical dotty layers and use Align to line up the tops or bottoms.
  • Apply a Drop-Shadow in Layer Styles for a little more realism.

Make a snowy background scene in Photoshop

Hope you all had a wonderful Christmas and are now looking forward to the start of a new year and what it will bring.  Our ginger tom was extra well fed on turkey and other bits. He takes on the role of Securicat while the big bird is cooking, he does it every year and very effective he is.  Never had it pinched yet.

Am sharing my quick way to create a snowy background with Photoshop. Download the pdf below for the instructions.

In case I don’t post again until Saturday or later, I wish you all a very happy and prosperous new year!

How to create a snowy background scene in Photoshop

Personalised chocolate bar wrappers

A great way to personalise and make a gift, even a small one, special, is to customise the wrapping. I like to take pics of my cats and bring them into Photoshop, obviously any photo manipulation SW will do, eg, Gimp and dress them up using filters. 

One of my favourites is the watercolour effect and them use brushes to add snowflakes or other theme-related doodahs. It’s very simple.

Step 1. Buy a bar of chocolate.

Step 2. Measure the length and the width of the front (where you want to display your chosen image or graphic then scale or crop your chosen image to size.

Step 3. Print the image on some good quality paper, appropriate to the theme. Conqueror metallic champagne was one of my go-tos but it’s very hard to get now.

Step 4. Take off the chocolate bar’s outer wrapper and fold round the new personalised cover. A dob of PVA glue will secure it round the back.

Beautiful beloved Homer, died September 2011 aged 21.

Create a watercolour effect painting in Photoshop

Follow my tutorial to render a photograph to a water colour-effect image. I  recommend using Glowing Edges / Invert but think Find Edges without the inversion would work just as well.

Download the pdf and have a go yourself. Have fun.

Original photograph of Skerries harbour
The water colour-effect applied to the original image